Setup Guide
Get Rimo working in your Slack workspace in minutes.
01
Install Rimo
Search for Rimo Translator in the Slack App Directory, or click "Add to Slack" from this page.
02
Authorize the app
Select your Slack workspace and click 'Allow' to grant Rimo the permissions it needs to read and post messages. You'll be redirected back automatically.
03
Open channel settings
In the Slack channel you want to configure, type @Rimo Translator and send the message. Rimo will reply with the channel settings panel directly in the conversation.

04
Enable auto-translate for a channel
In the settings panel, turn on Auto Translate and choose target languages from the dropdown.

05
See auto-translate in action
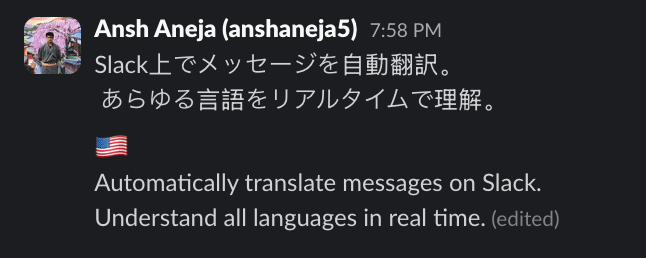
Post a message in any language in the configured channel. Rimo will automatically detect the language and post a translation in your chosen target language.
06
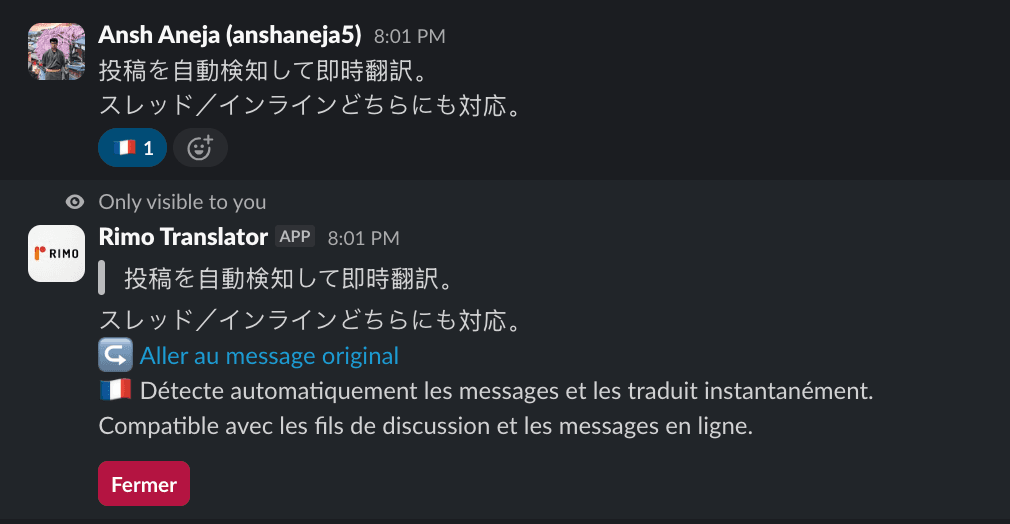
Use reaction translate
React to any Slack message with a country flag emoji — e.g. 🇺🇸 for English, 🇯🇵 for Japanese. Rimo will post a translation in that language as a reply.
07
Link your account to add translations to your messages
OptionalBy default, translations appear as thread replies. Link your personal Slack account to enable adding the translation inside your original message instead.


How to link your account:
1.Type @Rimo Translator in any channel to open the settings panel. Choose either Workspace Settings or Channel Settings.
2.Set Translation Mode to Add translation to message.
3.Send any message — Rimo will prompt you to click “Start Account Integration”.
4.You'll be taken to the Rimo website — click “Authenticate with Slack”.
5.On the Slack authorization screen that opens, click “Allow”.
6.Done — translations will now be added directly inside your messages.